What is your developer-dependent CMS actually costing you? Calculate your costs and get a full report


Marketplace Apps
Formstack
Easily create landing pages and contact forms with Formstack and Agility.
Embed powerful online forms into your Agility CMS-powered websites and applications using Formstack - a leading online form builder that empowers your team to create custom forms and collect data in minutes.
Overview
The Formstack integration retrieves forms you've created in Formstack, allowing you to easily embed them within your Agility-powered website or application. Editors can select which form to display directly from the Agility CMS interface.
Key Features
- Drag-and-drop form building - Choose from hundreds of templates or build custom forms
- Conditional logic - Create smart forms that respond to user inputs
- Multiple sharing options - Embed on websites, share via email, or post to social media
- Seamless CMS integration - Select forms directly within Agility's content editor
Getting Started
Prerequisites
- Formstack Account - Sign up for free
- Agility CMS Account - Start a free trial
Step 1: Create Your Form in Formstack
- Log in to your Formstack dashboard
- Click Create Form or select from available templates
- Use the drag-and-drop builder to add fields
- Configure form settings (notifications, confirmations, integrations)
- Publish your form
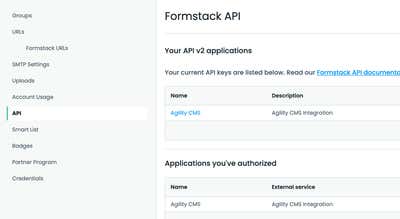
Tip: Note your form's name and ID - you'll need these for the integration.
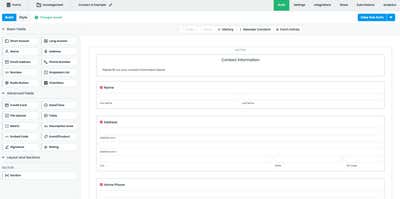
Step 2: Configure Formstack API Access
- Navigate to the Formstack API page
- Click New Application
- Fill out the application form:
- Application Name: Agility CMS Integration
- Description: Connect Formstack forms to Agility CMS
- Save and copy your API credentials
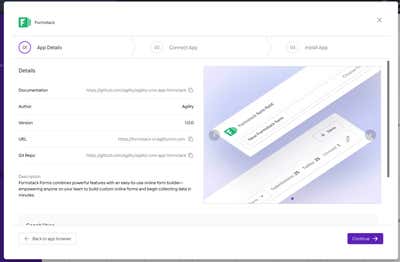
Step 3: Install the Formstack App in Agility CMS
- Log in to your Agility CMS instance
- Navigate to Settings → Apps
- Find and install the Formstack integration
- Follow the 3-step wizard:
- Step 1: App Details - Review the app information
- Step 2: Connect App - Enter your Formstack API credentials
- Step 3: Install App - Complete the installation
- Save the configuration
Step 4: Add Formstack Field to a Component Model
The recommended approach is to add the Formstack field to a Component Model. This allows editors to add the form component to any page, making it easy to place Contact Us forms, signup forms, or other Formstack forms anywhere on your site.
- Go to Models → Component Models
- Create a new component (e.g., "Formstack Form") or edit an existing one
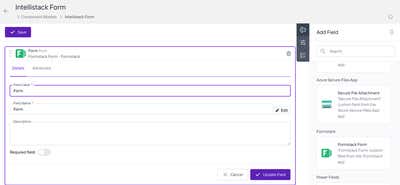
- In the Add Field panel, find the Formstack section
- Drag the Formstack Form field onto your component
- Configure the field settings:
- Field Label: Form
- Field Name: Form (or your preferred name)
- Required: As needed
- Click Save to save your component model
Why Component Models? Component Models represent functional UI components that editors can add to pages. This gives editors the flexibility to place forms on any page without developer intervention. In contrast, Content Models are better suited for reusable content that isn't tied to a specific UI component.
Step 5: Use in the Page Editor
Editors can now add the Formstack component to any page:
- Navigate to Pages and select a page to edit
- In a content zone, click Add Component
- Select your Formstack Form component from the list
- Click the Formstack field to see available forms
- Select the desired form from the dropdown
- Use the Edit in Formstack link to modify the form directly if needed
- Publish the page
Next.js Implementation
Note: The code examples in this section are for reference only and demonstrate one approach using Next.js with the App Router. Other frameworks (Dotnet, PHP, Astro, etc.) may require different implementation patterns. Always consult your framework's documentation for best practices on script loading and client-side rendering.
Installation
No additional packages required - Formstack forms are embedded via script injection.
FormstackForm Component
Use the next/script component with the afterInteractive strategy to prevent SSR hydration issues:
// components/agility-components/FormstackForm.tsx
'use client';

import { useEffect, useRef, useState } from 'react';
import Script from 'next/script';

interface FormstackFormProps {
  formId: string;
  formName: string;
  formstackDomain?: string;
}

const FormstackForm: React.FC<FormstackFormProps> = ({
  formId,
  formName,
  formstackDomain = 'your-domain'
}) => {
  const [isLoaded, setIsLoaded] = useState(false);
  const formContainerRef = useRef<HTMLDivElement>(null);

  if (!formId || !formName) {
    return (
      <div className="p-8 text-center text-gray-500 bg-gray-100 rounded-lg">
        No form selected. Please select a form in Agility CMS.
      </div>
    );
  }

  const scriptUrl = `https://${formstackDomain}.formstack.com/forms/js.php/${formName}?useDynamicRendering=true`;

  return (
    <div className="formstack-form-wrapper">
      <Script
        src={scriptUrl}
        strategy="afterInteractive"
        onLoad={() => setIsLoaded(true)}
        onError={(e) => console.error('Formstack script failed to load:', e)}
      />
      <div
        ref={formContainerRef}
        className={`formstack-form-container transition-opacity duration-300 ${
          isLoaded ? 'opacity-100' : 'opacity-50'
        }`}
      />
      {!isLoaded && (
        <div className="text-center py-4 text-gray-500">
          Loading form...
        </div>
      )}
    </div>
  );
};

export default FormstackForm;
Advanced: Using Formstack's Live Form API
For custom interactions with embedded forms, use the Live Form API:
// Example: Pre-filling form fields
useEffect(() => {
  // Wait for Formstack to initialize
  const checkFormReady = setInterval(() => {
    if (window.fsApi) {
      const form = window.fsApi().getForm('YOUR_FORM_ID');

      if (form) {
        // Pre-fill a field
        const emailField = form.getField('FIELD_ID');
        emailField.setValue({ value: 'user@example.com' });

        clearInterval(checkFormReady);
      }
    }
  }, 100);

  return () => clearInterval(checkFormReady);
}, []);
TypeScript Declarations
Add type declarations for the Formstack API:
// types/formstack.d.ts
interface FormstackField {
  getValue(): { value: string };
  setValue(data: { value: string }): void;
}

interface FormstackForm {
  getField(fieldId: string): FormstackField;
}

interface FormstackApi {
  getForm(formId: string): FormstackForm;
}

declare global {
  interface Window {
    fsApi?: () => FormstackApi;
  }
}

export {};
Styling the Form
Custom CSS
Override Formstack's default styles:
/* styles/formstack.css */
.formstack-form-wrapper {
  max-width: 600px;
  margin: 0 auto;
}

/* Override Formstack input styles */
.fsForm input[type="text"],
.fsForm input[type="email"],
.fsForm textarea {
  border: 2px solid #e5e7eb;
  border-radius: 8px;
  padding: 12px 16px;
  font-size: 16px;
  transition: border-color 0.2s;
}

.fsForm input:focus,
.fsForm textarea:focus {
  border-color: #3b82f6;
  outline: none;
  box-shadow: 0 0 0 3px rgba(59, 130, 246, 0.1);
}

/* Submit button styling */
.fsForm .fsSubmitButton {
  background-color: #3b82f6;
  color: white;
  border: none;
  border-radius: 8px;
  padding: 12px 24px;
  font-size: 16px;
  font-weight: 600;
  cursor: pointer;
  transition: background-color 0.2s;
}

.fsForm .fsSubmitButton:hover {
  background-color: #2563eb;
}
Advanced: Custom Form Rendering with the REST API
For complete control over form rendering, you can fetch the form definition from Formstack's REST API and build your own form UI. This approach is useful when you need:
- Full styling control without CSS overrides
- Custom field layouts or multi-step wizards
- Integration with your existing form libraries (React Hook Form, Formik, etc.)
- Server-side rendering of form structure
Important: The code examples below are for reference only and use React/Next.js patterns. Other frameworks and libraries will require different implementation approaches. Formstack does not officially support custom rendering implementations—you are responsible for your own validation, error handling, conditional logic, and submission logic. Always refer to the Formstack REST API documentation for the most up-to-date API specifications.
Prerequisites
- Personal Access Token - Create one at Formstack API Settings
- Form ID - Found in your Formstack dashboard or form URL
Fetching the Form Definition
Use the Formstack REST API to retrieve form structure and fields:
// lib/formstack-api.ts
const FORMSTACK_API_BASE = 'https://www.formstack.com/api/v2025';

interface FormstackFieldDefinition {
  id: number;
  label: string;
  type: string;
  required: boolean;
  readOnly: boolean;
  hidden: boolean;
  defaultValue: string;
  supportingText: string;
  options?: Array<{ label: string; value: string }>;
  logic?: {
    action: string;
    operator: string;
    fields: Array<{
      comparisonOperator: string;
      fieldId: string;
      value: string;
    }>;
  };
}

interface FormstackFormDefinition {
  id: number;
  name: string;
  url: string;
  submitButtonTitle: string;
  fields?: FormstackFieldDefinition[];
}

export async function getFormDefinition(
  formId: string,
  accessToken: string
): Promise<FormstackFormDefinition> {
  const response = await fetch(
    `${FORMSTACK_API_BASE}/forms/${formId}?withFields=true`,
    {
      headers: {
        Authorization: `Bearer ${accessToken}`,
        Accept: 'application/json',
      },
    }
  );

  if (!response.ok) {
    throw new Error(`Failed to fetch form: ${response.statusText}`);
  }

  return response.json();
}
Building a Custom Form Component
Render the form fields based on the definition:
// components/CustomFormstackForm.tsx
'use client';

import { useState, useEffect } from 'react';
import { getFormDefinition, type FormstackFieldDefinition } from '@/lib/formstack-api';

interface CustomFormstackFormProps {
  formId: string;
  accessToken: string;
  onSubmit?: (data: Record<string, string>) => void;
}

const FieldRenderer: React.FC<{
  field: FormstackFieldDefinition;
  value: string;
  onChange: (value: string) => void;
}> = ({ field, value, onChange }) => {
  if (field.hidden) return null;

  const baseClasses = "w-full px-4 py-2 border rounded-lg focus:ring-2 focus:ring-blue-500";

  switch (field.type) {
    case 'text':
    case 'email':
    case 'phone':
      return (
        <input
          type={field.type === 'email' ? 'email' : 'text'}
          value={value}
          onChange={(e) => onChange(e.target.value)}
          required={field.required}
          readOnly={field.readOnly}
          placeholder={field.supportingText}
          className={baseClasses}
        />
      );

    case 'textarea':
      return (
        <textarea
          value={value}
          onChange={(e) => onChange(e.target.value)}
          required={field.required}
          readOnly={field.readOnly}
          rows={4}
          className={baseClasses}
        />
      );

    case 'select':
    case 'radio':
      return (
        <select
          value={value}
          onChange={(e) => onChange(e.target.value)}
          required={field.required}
          className={baseClasses}
        >
          <option value="">Select...</option>
          {field.options?.map((opt) => (
            <option key={opt.value} value={opt.value}>
              {opt.label}
            </option>
          ))}
        </select>
      );

    case 'checkbox':
      return (
        <input
          type="checkbox"
          checked={value === 'true'}
          onChange={(e) => onChange(e.target.checked ? 'true' : 'false')}
          className="w-5 h-5"
        />
      );

    default:
      return (
        <input
          type="text"
          value={value}
          onChange={(e) => onChange(e.target.value)}
          className={baseClasses}
        />
      );
  }
};

export const CustomFormstackForm: React.FC<CustomFormstackFormProps> = ({
  formId,
  accessToken,
  onSubmit,
}) => {
  const [form, setForm] = useState<Awaited<ReturnType<typeof getFormDefinition>> | null>(null);
  const [formData, setFormData] = useState<Record<string, string>>({});
  const [loading, setLoading] = useState(true);
  const [submitting, setSubmitting] = useState(false);
  const [error, setError] = useState<string | null>(null);

  useEffect(() => {
    getFormDefinition(formId, accessToken)
      .then((data) => {
        setForm(data);
        // Initialize form data with default values
        const defaults: Record<string, string> = {};
        data.fields?.forEach((field) => {
          defaults[field.id.toString()] = field.defaultValue || '';
        });
        setFormData(defaults);
      })
      .catch((err) => setError(err.message))
      .finally(() => setLoading(false));
  }, [formId, accessToken]);

  const handleSubmit = async (e: React.FormEvent) => {
    e.preventDefault();
    setSubmitting(true);

    try {
      // Submit to Formstack API
      const response = await fetch(
        `https://www.formstack.com/api/v2025/forms/${formId}/submissions`,
        {
          method: 'POST',
          headers: {
            Authorization: `Bearer ${accessToken}`,
            'Content-Type': 'application/json',
          },
          body: JSON.stringify({ fieldData: formData }),
        }
      );

      if (!response.ok) throw new Error('Submission failed');

      onSubmit?.(formData);
      alert('Form submitted successfully!');
    } catch (err) {
      setError('Failed to submit form');
    } finally {
      setSubmitting(false);
    }
  };

  if (loading) return <div className="animate-pulse">Loading form...</div>;
  if (error) return <div className="text-red-500">Error: {error}</div>;
  if (!form) return null;

  return (
    <form onSubmit={handleSubmit} className="space-y-6">
      {form.fields?.map((field) => (
        <div key={field.id} className="space-y-2">
          <label className="block font-medium">
            {field.label}
            {field.required && <span className="text-red-500 ml-1">*</span>}
          </label>
          <FieldRenderer
            field={field}
            value={formData[field.id.toString()] || ''}
            onChange={(value) =>
              setFormData((prev) => ({ ...prev, [field.id.toString()]: value }))
            }
          />
          {field.supportingText && (
            <p className="text-sm text-gray-500">{field.supportingText}</p>
          )}
        </div>
      ))}

      <button
        type="submit"
        disabled={submitting}
        className="w-full py-3 px-6 bg-blue-600 text-white rounded-lg hover:bg-blue-700 disabled:opacity-50"
      >
        {submitting ? 'Submitting...' : form.submitButtonTitle || 'Submit'}
      </button>
    </form>
  );
};
Server-Side Form Fetching (Next.js App Router)
For better performance, fetch the form definition server-side:
// app/forms/[formId]/page.tsx
import { getFormDefinition } from '@/lib/formstack-api';
import { CustomFormstackForm } from '@/components/CustomFormstackForm';

export default async function FormPage({ params }: { params: { formId: string } }) {
  const form = await getFormDefinition(
    params.formId,
    process.env.FORMSTACK_ACCESS_TOKEN!
  );

  return (
    <div className="max-w-2xl mx-auto py-12">
      <h1 className="text-3xl font-bold mb-8">{form.name}</h1>
      <CustomFormstackForm
        formId={params.formId}
        accessToken={process.env.FORMSTACK_ACCESS_TOKEN!}
      />
    </div>
  );
}
Field Types Reference
Common Formstack field types returned by the API:
| Type | Description |
|---|---|
text | Single-line text input |
textarea | Multi-line text area |
email | Email address field |
phone | Phone number field |
number | Numeric input |
select | Dropdown selection |
radio | Radio button group |
checkbox | Single checkbox |
name | Name field (first/last) |
address | Address field (multiple parts) |
datetime | Date and/or time picker |
file | File upload |
section | Section divider/header |
Note: The REST API approach requires managing your own form validation, error handling, and submission logic. For simpler use cases, the embedded script method is recommended.
Troubleshooting
Form Not Rendering
- Check the form name - Ensure it matches exactly (case-sensitive)
- Verify domain - Replace
your-domainwith your actual Formstack subdomain - Check console - Look for JavaScript errors in browser dev tools
- Dynamic rendering - Ensure
?useDynamicRendering=trueis appended to the script URL
Hydration Errors in Next.js
- Always use
'use client'directive for form components - Use
next/scriptwithstrategy="afterInteractive" - Avoid rendering the script tag directly in JSX
Form Submissions Not Working
- Verify the form is published in Formstack
- Check Formstack submissions for received data
- Review form notification settings
Resources
Formstack Documentation
- Formstack Help Center
- Embedding Forms
- React Embedding Guide
- JavaScript API Reference
- Live Forms API Examples
- REST API Documentation
Agility CMS Documentation
- Agility CMS Docs
- Formstack Integration Guide
- Component Models
- Content Models
- Key Concepts
- Developer Getting Started
Community & Support
On this page