Agility Sneak Peek: Content Preview
Content preview comes to the rescue, giving editors an instance where they can preview their work before it’s live.

If there’s a universal truth about building websites, it’s that you can’t trust things will look right at the first try. Even the most meticulous developer can make a mistake. Now imagine what could happen if you enter non-technical content editors into the equation. The chances of something breaking can suddenly increase.
That’s where content preview comes to the rescue, giving editors an instance where they can preview their work before it’s live. It’s the editors’ safety net; it provides them with the visibility they need to fix issues before visitors spot them.
Agility CMS empowers editors to build digital experiences with confidence through a robust, native preview mode. In this article of the Agility Sneak Peek series, we will explain more about this feature and show you how you can use it.
Let’s take a closer look at how content preview works in Agility CMS and learn how developers and marketers can leverage their functionality to create a bug-free, functional digital experience.
What Is Content Preview?
The content preview features enable admins to define a preview environment where editors can check drafts and published content before they go live or test changes once the content has been published.

While most traditional CMSs offer a preview mode, not all headless CMSs do, and most have to integrate with third-party tools to enable previewing.
Since headless CMSs don’t offer the traditional WYSIWYG experience most editors have come to expect with traditional CMSs, some users can be at a loss when it comes to switching to a headless architecture or when building a static site. However, one of the best things about Agility CMS is that we are a hybrid headless CMS, which means we offer you a robust preview experience within a headless environment.
Content Preview In Agility CMS
- To enable Agility CMS content preview, click on the ‘Shared Content’ section of your Agility CMS installation (below ‘Pages’) and click on ‘Dynamic Page List’. In this case, let’s go to ‘Products’.
- Set up both the ‘List Preview Page’ and the ‘Item Preview Page’ field. The ‘List Preview Page’ is the listing page where the content is displayed. In this case, the ‘Products’ page. The ‘Item Preview Page’ is the dynamic page of the content item. In this case, the page would correspond to a specific product page.
- Click on the ‘Link’ button and link the respective pages.
- Click on the ‘Save’
- To test this, go to ‘Shared Content’.
- Select an item to modify, change it and click on ‘Save’.
- Now click on ‘Preview’ and voila, now you can preview your content!
If you want a more visual, interactive version of this tutorial, click on the video below.
Preview Content In Agility CMS Using Gatsby
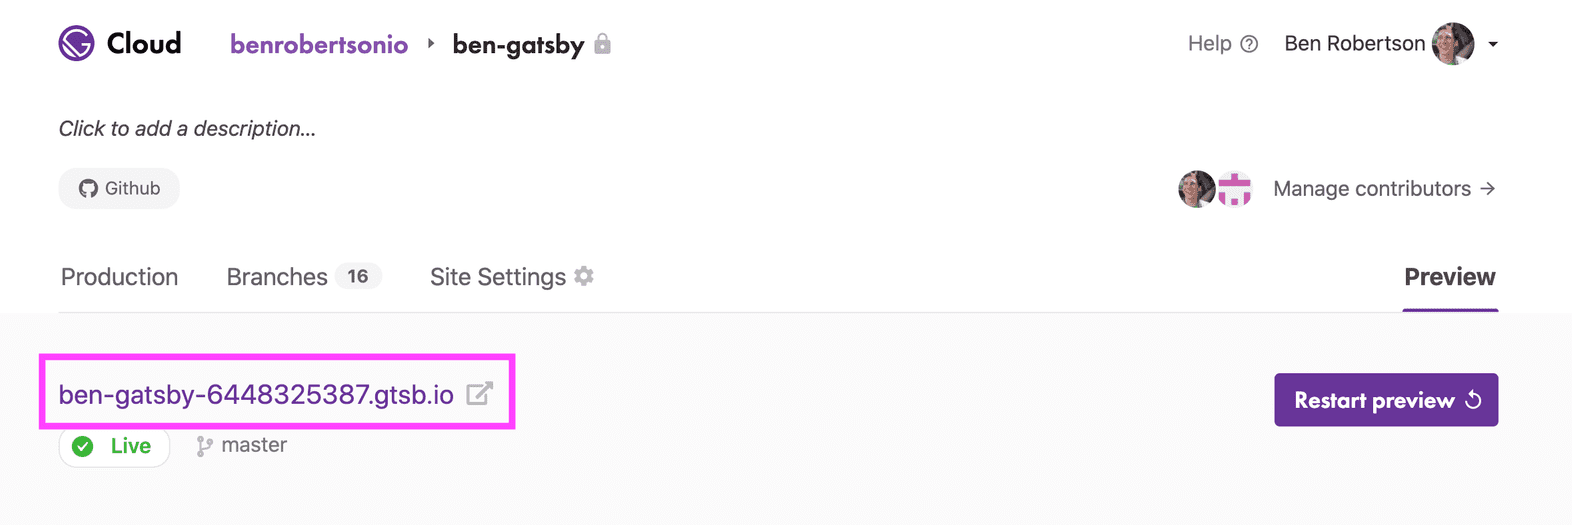
- Find your Gatsby Cloud Preview domain and add a URL. You can find it in your Dashboard using Gatsby Cloud.
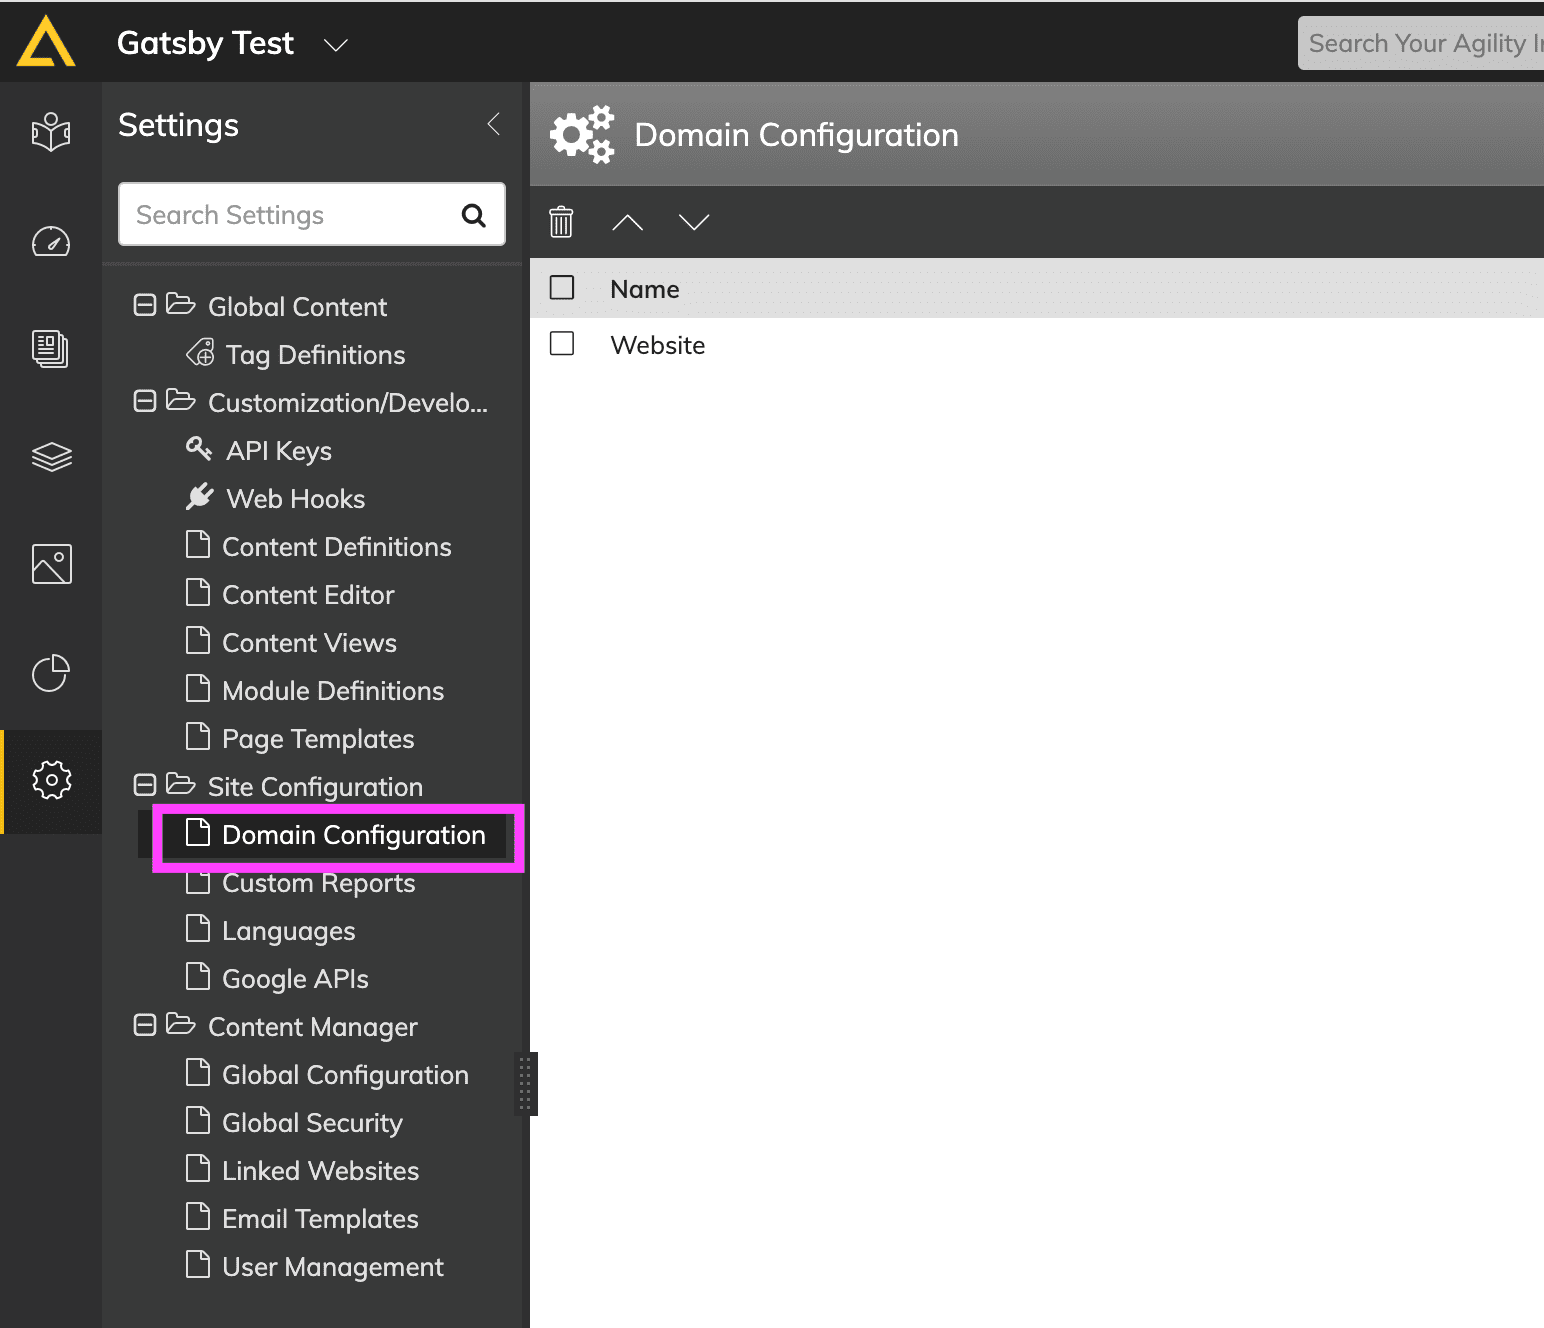
- Now go to Agility CMS and click on ‘Settings’ and then go to ‘Domain Configuration’ below ‘Site Configuration’.
- Click on ‘Website’ to edit the settings and then click on ‘+’ to add a new domain.
- Name your domain and paste the preview URL you copied from Gatsby Cloud.
For more information about the content preview in Gatsby, check out these steps from Gatsby’s documentation Setting the Gatsby Preview domain for Agility CMS:
1 | Setting the Gatsby Preview Domain for Agility CMS
The final step in configuring Agility CMS and Gatsby Cloud is to make sure that content editors are able to preview their content by clicking the preview button from within the content management system.
2 | Finding the Gatsby Cloud Preview domain
You’ll want to add the URL of the Gatsby Preview instance as a domain in Agility CMS. To find this domain in Gatsby Cloud, go to your Dashboard and click on the Preview tab. The URL will display at the top of this tab:

Copy this URL.
3 | Adding a new domain in Agility CMS
In your Agility CMS dashboard, click on Settings in the Menu, and then find Domain Configuration below Site Configuration.

Click on “Website” to edit the settings, and then the plus sign to add a new domain.
Name your new domain something like “Preview”, and for the Domain URL past the Preview URL you copied from Gatsby Cloud. Also, check the “Preview Domain” checkbox. This setting will make it so that clicking “Preview” on an Agility CMS entry will open the appropriate page in your Gatsby Preview.
Click Save.
Categories
Agility Sneak PeekAgility Sneak Peek
Topics
Working with Agility CMSWorking with Agility CMSHeadless CMSHeadless CMS
How can Agility CMS empower you? Learn more about our unique tools!
Learn more about Agility CMS difference
Get in touch with our friendly experts
